Wednesday, August 21, 2013

Heartfelt Creations Inspiration


Heartfelt Creations Products
Christmas Card Collection HCDP1 236
Sweet Memories PreCut Set HCPC 3555
Christmas Song PreCut Set HCPC 3556
Ornamental Add On Die HCD 738
Other:

Want2Scrap Bling
CTMH ink
May Arts Ribbon QM16
Kraft Tag

Cover the bottom of the tag with patterned paper.  Stamp pine boughs behind where the die cuts will be positioned.  Stamp the sentiment a cut with a circle die.  Ink the edges.  Stamp the bird, color with ink and blender and fussy cut.  Die cut the ornamental die and position at the bottom of the sentiment.  Cut foliage and arrange at the top, and place the bird nestled in it.  Add Want2Scrap bling around the sentiment. Finish with ribbon.

Monday, August 19, 2013

May Arts Ribbon Cutting Blog Hop


The May Arts Ribbonistas are so excited - and we know you will be too...to celebrate the launching of the new and improved May Arts Ribbon Website. This celebration is so big that  last year's design team has joined up with the new design team for one more hop.  And big prizes? Oh yeah - over $1000 in goodies are up for grabs!  Leave comments on any of the designers  blogs for entries to win!


I interpreted "ribbon cutting" by cutting into a brand new roll of ribbon! And honestly, this ribbon is so yummy, I don't know how I have resisted using it, until now.

  
I created a pocket card, decked out with May Arts ribbons - and my tag, has a piece of ribbon with "Congratulations" stamped on it. Of course, this is congratulating May Arts Ribbon and Bethney, the Ribbon Lady, on such a fantastic new site!


The hop is only two days, but don't worry, you will see so many ribbon ideas to inspire you!  Here is the line up for today:
·         Christina Colón
·         Gini Williams Cagle
·         Emily Lanham
·         Jenifer Cowles
·         Jessica Kephart
·         Courtney Lee
·         Latrice Murphy
·         Charlene Driggs
·         Erin Thiem

May Arts Ribbons 

Partners In Craft Supplies

Other Supplies:
Black Tag
WorldWin Papers Kraft Cardstock
CTMH Ink, Enameled Number Tag

Steampunk Canvas


I love trying new techniques and creating mixed media explorations.  A week or so ago, I had finished the base of this canvas –  it was covered with embossing powders, pastes and sprays, but had no final decorations added to it. I decided to add some steampunk elements to finish it out. 


Supplies

 Stamps
Hampton Art / 7gypsies  Time is Precious (PS0742), Distressed Clock (PS0679)
 Ink
Clearsnap  Top Boss – Watermark ink
Other Supplies
WorldWin Cardstock
Lindy’s Stamp Gang Embossing Powder  
 Moon Shadow Mists
 Starburst Mist
Dreamweaver Black Embossing Paste
TCW stencil
Gesso
Tissue Paper
Canvas
Xyron Mega Runner

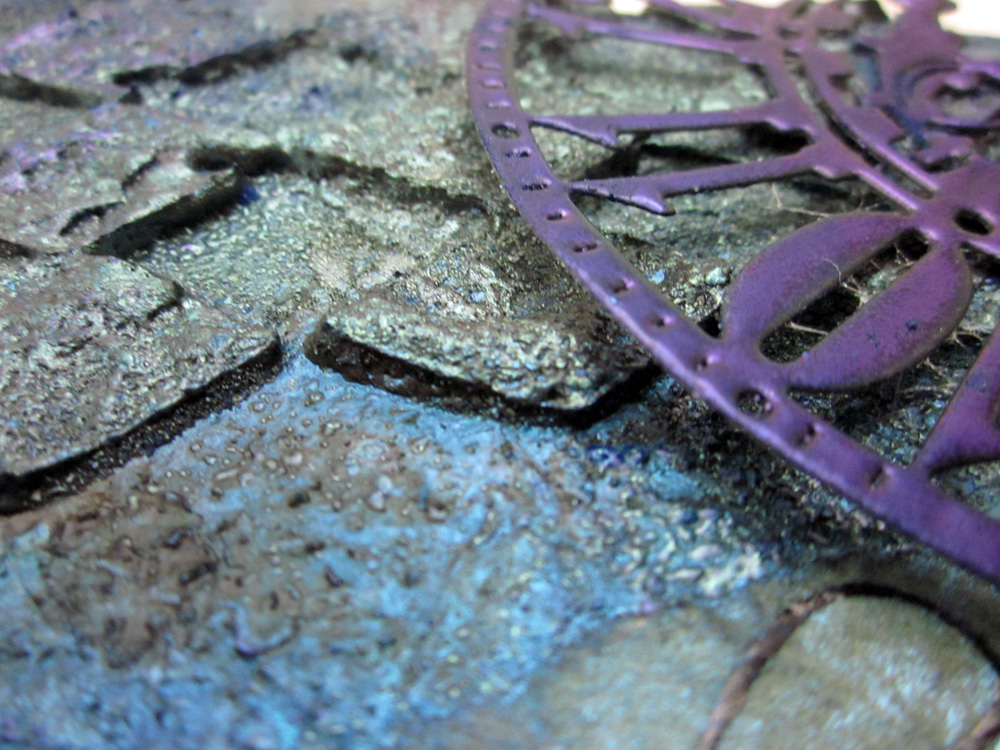
Here is how I put the canvas together-
Crumple tissue paper and run through Xyron 5” Creative Station to apply adhesive to the surface.  Tear pieces of the paper and lay onto the canvas.  Cover the entire canvas this way.  Paint a layer of gesso over the tissue paper and allow to dry. Rub the watermark ink over the high spots of the canvas and heat emboss with the dark blue powder. Spritz with mists. Randomly stamp the watermark ink across the canvas and sprinkle with the light blue powder and heat emboss. Mist again.  Use a stencil template to apply embossing paste in a diamond pattern. While wet, sprinkle with embossing powder, and heat set immediately.  This will cause the embossing paste to bubble some. Add another layer of mists and more random embossing powder.   Stamp the sentiment and the clock onto tissue paper with watermark ink, and heat emboss with a black powder.  Glue onto the canvas and spray heavily with the mists and allow to air dry.  Die cut the Steampunk elements and rub with the watermark ink, and heat emboss 3 layers of powder.  Apply to the canvas.  

If you would like more explanation, please check out my video tutorial.